Sunday, February 19, 2012

Another Project Finished!

I'm 2 for 2!  I finished my second project in 2012.  This is a lap quilt that I started at Quilt Escape 2011.  I took a class from Sandi Blackwell called "Square-Agonals."
The technique involves creating the quilt in straight rows, then cutting it apart diagonally on specific lines, then stitching it back together to create the diagonal, on-point effect without having to set in any triangles such as those around the perimeter of the quilt.

This quilt is 65" square and I used a flannel for the backing.  I used a pantograph for the quilting pattern and an Egyptian cotton thread, King Tut from Superior Threads, in a variegated green.  Here are a couple close-ups of the quilting.
Here is a close-up view of the quilting pattern.
This is a view from the back.

You can see how well it goes with the sofa.

Registration for this year's Quilt Escape begins on March 1.  Must decide which class I want to take this year! 

Pam

Saturday, January 28, 2012

January Goal

I decided not to make any New Year's Resolutions this year.  Instead, I am setting goals.  One of my goals is to finish one U.F.O. (Unfinished Fabric Object) each month.  I have more than enough to get through 2012 and perhaps even 2013!

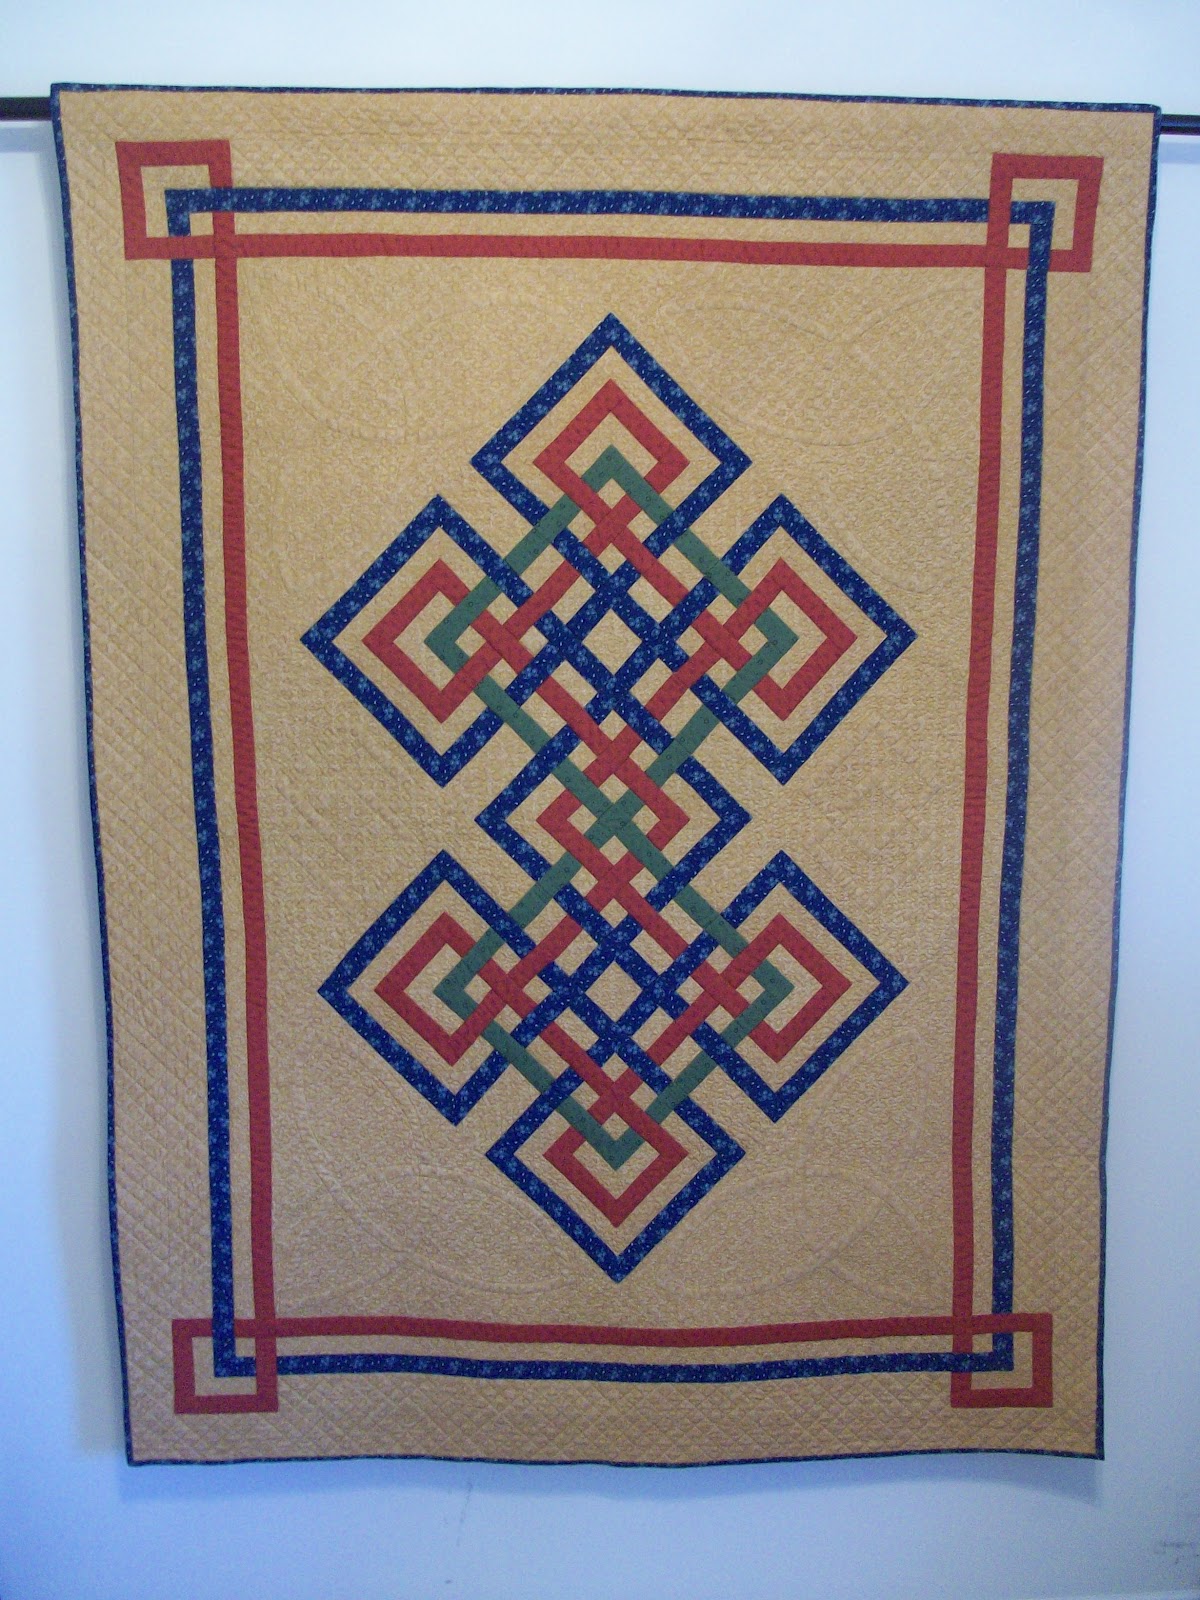
So, my first UFO completion is the quilt I started at the Quilt Escape retreat that I went to in 2010.  I took a class from Peg Bingham who has developed a method to make the Celtic knot quilts using a pieced method instead of applique.  This is my quilt entitled "2B or Knot 2B."  This may require a little explanation!

There is a lot of strip cutting for this quilt and to keep everything straight, Peg encourages you to cut all similar strips and put them in a baggie with labels.  For example, Fabric 1 might have pieces in different lengths labeled A, B, C, D - you get the picture.  So, I decided that the name of my quilt would be "2B or Knot 2B" - get it?  LOL.

Here is a close-up of the center design.


I outline quilted all of the interlocking strips and then stipple quilted in all of the background spaces.  I created a celtic-style design in the corners and on either side which I outlined and stippled to bring out the design. Here is the corner design.
Here is the design on the side.

And here are some views of the back.


This was my first attempt at something like this, so I know there is lots of room for improvement.  But, overall, I'm pretty pleased with the result.

I've got the quilt from last year's retreat on the machine now.  So I'm hoping to get it finished in time to post next month.

In the meantime, here is a look at my current Winter theme for the fireplace mantle.


 I used candles to coordinate with the colors in the wreath.  Each of the candle holders is a slightly different shape for interest.  The mantle cover is something I made many years ago.  It is pieced but not actually quilted.

Until the next time......................

Pam


Tuesday, October 18, 2011

October Is My Favorite Month

Well, autumn arrived a few weeks ago and we have had the weather to prove it.  Warm, sunny days and cool nights.  I took the opportunity to put away the summer decorations and get out the fall.  My fireplace mantle gets a makeover every season.  Here's what it looks like this year.


Of course, I have to change the quilt displayed in the family room, too.  Here is a quilt I made a couple of years ago from a pattern called Fall Frolic designed and published by Whimsical Quilts.


The original pattern was designed as a 22" x 31" wall hanging.  But since my quilt rack can hold up to a 48" wide quilt, I enlarged the pattern to fit the rack.  My finished quilt is 47" x 59".  I made a few other minor changes based upon my stash, but the finished quilt looks pretty close to what the picture on the pattern shows.  I just love the colors.

Check out the Whimsical website at http://www.whimsicalquilts.com/.  They have so many cute patterns for quilts, purses and other crafts as well as books and a fabric line.  I know I need to try a couple more!

Well, I'm getting ready to go on a weekend retreat in a couple weeks.  QuiltEscape is a weekend-long quilting retreat held at Shawnee State Park near Portsmouth, Ohio.  I attended last year for the first time with 2 friends and, needless to say, I'm going back again this year! 

Until next time.....................
Pam

Sunday, September 25, 2011

Sewing Room Makeover

Hello, sewing and quilting afficionados!

After a fairly long absence from blogging, I think it only fitting to re-enter the blogging world by posting pics of my new sewing space.  The loft that I call my sewing room is approximately 12 1/2 feet by 8 feet and is located above the garage.  It fits into the roofline - so the ceiling on either side slopes down to about 5 feet.  I decided to build in my sewing stations on one side and create a counter-high cutting/storage area on the other. 

Let me take you on a tour.

This is how my sewing loft looks as you enter.

Three workstations at a lower height are on the one side.  Stock laminate countertop with a backsplash was used and cut to fit in between the two 18" cabinets on either end.  Cords are fed through holes drilled behind each machine to plug in below the work surface.  Thread is stored on racks and a parts cabinet contains needles, presser feet and other small items to keep them handy.


Counter-high cutting surface and storage.  Laminate countertop was custom ordered at 31" wide to correspond with the width of the drafting table that I use for a cutting surface.  The countertop and storage is 9 feet long and the total surface is 12-1/2 feet long with the drafting/cutting table.  (It's not usally this cleared off!)

One nice thing that may not be evident from looking at the pictures is that nothing is actually built in.  All the cabinets were purchased as unfinished cabinets at the local home improvement store.  I stained them a honey oak and put a couple coats of polyurethane on them.  None of the cabinets are attached to the wall.  The workstation countertop is screwed into a 2x4 that is bolted to the wall into studs - but that is the only "attached" part of this design.

The cutting/design side cabinets are all separate cabinets and are about 7-8 inches out from the wall to accommodate the 31" wide counter top.  Though they are not attached to the wall, they are bolted to each other to prevent shifting.  The countertop is not attached, either - it is just sitting on top of the cabinets.  But it is heavy enough that it does not move.

Everything is sitting on top of the carpeting.  If, in the future, we want to replace the carpeting, everything can be easily taken apart and moved. 

I should note that most of my fabric stash is actually stored in an adjacent bedroom closet.  I have put shelving in the closet to store my fabric, sorted by color.  Patterns are on the top shelf.   And larger objects such as my sewing machine caddy, portable quilt rack and other miscellaneous items, are stored on the floor.  I have left a little hanging space so that I can hang projects in process. 

Hopefully I won't wait so long before posting my next blog!

Pam


Sunday, February 6, 2011

February Means Hearts!

MY VALENTINE QUILT
Today is the Super Bowl, but it is also the day that I got out my Valentine's Day Quilt for display.  I made this quilt several years ago and my skills have improved somewhat, but I still like this quilt and put it up every February.

The quilt is made from a pattern in "Time To Quilt" by Anne Moscicki and published by That Patchwork Place.    I have made several quilts from this book and they are all very easy to make.

TIME FOR A CHANGE

We are also doing a little "undecorating" in our sun room.  We had two large fake ficus trees in the corners of the room that just needed to go.  But the corners needed something.  So we purchased these corner shelves at Target and put 2 in each corner.  They were pretty easy to put up - except that we discovered are corners are far from square!  So the effect is that they are "floating."  I can live with that! 

I purchased some small ivy plants and put them in white ceramic planters, then scrounged around the house for something taller to put on the top shelf.  These two vases probably aren't permanent, but they'll do for now.
The sun room on the back of our house was probably one of the best design decisions we made when building nearly 10 years ago.  The room extends beyond the back of the house and has windows on three sides.  I chose not to put any heavy window coverings to admit more light.  It is painted light blue (reminds me of the sky) and I stenciled a small design above each window. 

As always, my decorating is a work in progress.  Less is more in this room where I try to keep it light and airy.  The views are spectacular every season.  At Christmas, the tree goes where the plant stand is right now and is visible from the family room and kitchen.   Here are close-ups of the stencil that I have above each window.

TEXAS SHEET CAKE BROWNIES

I am a chocoholic.  I admit it.  Today I had a craving for Texas Sheet Cake Brownies which are chocolate upon chocolate.  It is a cake-like brownie with a rich chocolate frosting.  This is a recipe I cut out of the newspaper many, many years ago.  An oldie, but a goodie.

2 cups flour
2 cups sugar
1 teaspoon baking soda
1/2 teaspoon salt
1 cup (2 sticks) margarine
1 cup water
4 tablespoons cocoa
1/2 cup sour milke or buttermilk
2 eggs, slightly beaten

Mix flour, sugar, baking soda and salt in large bowl.  Melt margarine in a small saucepan and add water and cocoa.  Bring to a boil, then pour over the dry ingredients.  Mix until blended.  Then stir in the eggs and buttermilk.  Pour into a 10"x15" sheet cake pan that has been greased and floured.  Bake 20-22 minutes at 350 degrees.  Frost while warm with:

Frosting:
1/2 cup (1 stick) margarine, softened to room temperature
1 pound confectioners sugar
4 tablespoons cocoa
3-6 tablespoons milk

Mix margarine, sugar and cocoa, adding milk one tablespoon at a time until creamy consistency is reached. 

Enjoy.
PAM


Sunday, January 23, 2011

No-Sew Fleece Throws & Hot Chocolate

NO-SEW FLEECE THROWS

A friend of mine has made tied, no-sew fleece throws for a couple of years and donates them to charity.
So, when I found these Disney kits at my local fabric store, I used my 40% off coupon and got a couple.
So, how simple are they?  Incredibly simple.  The kits come with the printed panel and a solid piece of fleece - both approximately the same size, although you will have to trim them a bit.  The fringes are marked outside the perimeter of the printed panel.  So all you have to do is put them together and smooth out any wrinkles.  I safety pinned the two layers together to help prevent shifting; although, the fleece does a pretty good job of sticking to itself.
Cut out the corner and start cutting the fringes on the dotted lines.

Tie the two parts of each fringe together.

Here's a peek of what the back looks like.
I thought that it would take a while, but it was amazingly quick and easy.


HOT CHOCOLATE MIX

This frigid weather reminded me of the instant hot chocolate mix that I used to make when the kids were little.  You can make up a big container and all you have to do is add hot water.  It tastes so much creamer than the commercial instant mixes. 

1 lb. jar dry non-dairy creamer
1 box instant low-fat dry milk (to make 8 pints, or 4 quarts)
1 lb. powdered sugar
2 lbs. instant hot chocolate mix
2 teaspoons salt

Mix all ingredients well and store in an airtight container.  Add 1/4 cup of the dry mix to 8 ounces of HOT water.  You could add miniature marshmallows if you are so inclined!

Stay warm!

PAM

Sunday, January 16, 2011

Pam's Rule of Three and What's For Dinner?

Someone once said that rules were meant to be broken - I just wish I wouldn't keep breaking my own rules!

Rule of thumb when buying fabric - buy a minimum of three yards.  That's what I call my Rule of Three.  When I see some fabric that I simply fall in love with but haven't the foggiest what I'm going to do with it, I need to buy a minimum of three yards.  And even when you have a project in mind but can't remember how much yardage you need, you're generally safe with three yards.
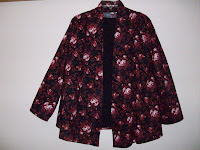
Red/Black Print with Long Sleeves

For example, I bought this black and red print cotton fabric to make this jacket, but I couldn't remember how much I needed.  I thought 2 yards would cover it.  But when I went to cut it out and couldn't fit all the pattern pieces on the fabric, I looked at the fabric requirements and was stunned to see "2-1/2 yards" for the jacket I wanted to make.  Now that extra half yard was critical!
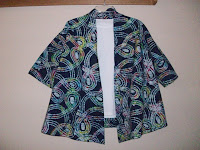
Batik With 3/4 Length Sleeves

So, the other night on the way home from work, as the weather forecasters were predicting another wintery blast and folks everywhere were heading to the grocery stores to stock up on milk and bread, I had to stop at the fabric store to get that last little bit of fabric to work on my project in case I got snowed in!  Never mind food - I'll find something to eat - but not being able to work on my latest project - now that's a tragedy!  (Don't tell my DH - he already thinks I have enough fabric to start my own fabric store!)

Anyway, I have made two jackets from this particular pattern (A Little Somethin' Jacket) and I am still making small adjustments each time - mostly trying to do as much on my serger as possible.  But it's a cute jacket to wear both with jeans or dressier pants.   Check out this and other patterns on their website http://www.cntpattern.com/ .  They are quick and easy and just a little different.

WHAT'S FOR SUPPER?

It's the age-old question.  I have tried to make this a little less painful by planning my menus a week in advance, then making up my shopping list based upon the ingredients needed -- less what I have on hand.  I have written out 3x5 index cards with menus complete with the main entre, salad, bread - whatever I usually put together for a complete meal.  Then on the back of the card I will write all of the ingredients needed.

Once I have my 5-7 meals for the week, I can then make a shopping list and head to the store, confident that at the very least, I will have the ingredients necessary to make those meals.

A website that I have found extremely helpful in getting new ideas for meals is the Kraft Recipes website - http://www.kraftrecipes.com/.  You can search for recipes by category, ingredients, type of recipe, etc.  And you can save them to your own personal recipe box.  You can even save your own recipes.  And, if you're so inclined, you can submit them to Kraft along with a picture for their review and possible publication for everyone else to see.  I have not done that yet.  But I'm thinking about it - Kraft Velveeta Cheese is a staple in my pantry!

Another neat feature is that you can choose a particular recipe and actually ask the site to add the ingredients to your own personal shopping list!  You can then add your own items to that list and take off items you may already have on hand.  The only drawback to this is that you cannot add items from your own personal recipes to the shopping list.  So you have to add those manually.  But I've done this a couple times and it really is a nice feature. 

If you're tired of the same old thing, give this website a look and see what new possibilities you can come up with.  I'm sure there are other websites out there that do pretty much the same thing.

More next week....................
Pam